Film VFX Breakdown And The Hobbit Information

As one of my favorites film series i decided to go with The Hobbit . Both Hobbit and Lord Of The Rings are great films when it comes to VFX as both have lots of creatures that are not simply walking around earth. Lots of the areas as well are redone and also a main part of the films are VFX the battles. I also decided to go for the film because it was made by one of my favorite VFX studios ( Weta Digital).

Why The Hobbit first of all ? There is many amazing places in the hobbit , you can see from this amazing concept art of “Erebor” by John Howe that the structures are “out of this world” .

I found this good video online on youtube that showcases some of the VFX in the hobbit and shows what they actually look like , it features both characters and places.


All the locations of The Hobbit Trilogy was filmed entirely in New Zealand, throughout locations in both the North and South Islands.

Here is a concept art of “Gandalf” (Sir Ian McKellen) in a place called Hobbiton which you can actually visit.  Here is a description of it :

The rolling hills of The Shire were once again brought to life near Matamata, where Hobbiton was re-built for The Hobbit Trilogy. Also used in The Lord of the Rings Trilogy, Hobbiton has remained open as an attraction for Middle-earth fans. Enjoy peering over a Hobbit’s front gate, dancing under the party tree or swigging back a beer at The Green Dragon Inn.

Joe Letteri

Joe Letteri, ONZM is a senior visual effects artist, winner of four Academy awards, four BAFTA awards and four VES awards. He is the current Director of the Academy Award-winning Weta Digital, having joined the company in 2001. He was the Visual Effects supervisor for The Hobbit.


For more information on the production of The Hobbit id recommend watching these videos :


Weta Digital – VFX Company Spotlight


for-peter-jacksons-weta-digital-the-cloud-does-not-computeWeta Digital is one of the world’s premier visual effects companies. Led by Senior Visual Effects Supervisor Joe Letteri, Weta Digital is known for uncompromising creativity and a commitment to developing innovative technology. Groundbreaking performance-driven digital characters like Smaug, Gollum, Kong, Neytiri, and Caesar (from Dawn of the Planet of the Apes) are widely acknowledged as some of the best digital characters ever put on screen. Weta’s development of revolutionary virtual production workflows for Avatar, The Adventures of Tintin, and the Hobbit trilogy has firmly integrated digital production techniques into the film production paradigm.


Co-founder Peter Jackson established Weta Digital in 1993 to create the visual effects for his film Heavenly Creatures. The company went on to cement its reputation for cutting edge visual effects with work on blockbusters like the Lord of the Rings trilogy and King Kong.


Weta Digital has five visual effects Oscars® and five visual effects BAFTAs to its credit, and has recently completed the visual effects for The Hobbit: The Battle of the Five Armies and Dawn of the Planet of the Apes.


Projects Weta Digital Have Worked On

  1. Alvin and the chipmunks , The road chip
  2. Independence Day
  3. The Krampus
  4. The BFG
  5. Maze runner the scorch trials
  6. The jungle book
  7. Fantastic 4
  8. Batman V Superman dawn of justice
  9. Furious 7
  10. Hobbit , the battle of five armies
  11. Dawn of the planet of the apes
  12. Hobbit , desolation of smaug
  13. Iron Man 3
  14. The wolverine
  15. Hobbit, an unexpected journey
  16. Man of steel


Weta Digital is part of a neighbourhood of creative companies including Weta Workshop, Park Road Post Production, Stone Street Studios and Portsmouth Rentals.

Sister companies

Weta Digital is part of a network of creative companies based in the Wellington suburb of Miramar – home to some of the worlds finest filmmaking talent and technology.

Weta Workshop

Another recipient of multiple Academy Awards®, Weta Workshop is responsible for the beautifully realised physical environments of both King Kong and The Lord of the Rings trilogy. The Workshop offers services in design, makeup effects and prosthetics, creatures, museum display models, armour and chain mail, weapons and sculpture.

Contact Weta Workshop

Phone: + 644 909 4000

Email: info@wetaworkshop.co.nz

Website: www.wetaworkshop.com

Park Road Post Production

Park Road is a premier post production facility offering a relaxing and inspiring environment for filmmakers to realise their vision. The facility offers sound mixing services, digital intermediate, end to end stereoscopic services, digital lab services, as well as a Kodak Imagecare accredited film processing lab.

Contact Park Road Post Production

Phone: + 644 909 7800

Email: parkroad@parkroad.co.nz

Website: www.parkroad.co.nz

Stone Street Studios

Stone Street Studios has two purpose-built sound stages, including the massive 24,500 square foot stage, four adapted warehouse stages, and a large back lot that can house a wet stage. It also offers services in production, construction, wardrobe, makeup and art department.

Contact Stone Street Studios

Phone: + 644 388 9813

Email: info@stonestreetstudios.co.nz

Portsmouth Rentals

Portsmouth Rentals is a complete film equipment rental company with a vast range of lighting, lighting trucks, grip, unit, location and special effects equipment for hire. It has a consumables outlet that sells everything from gaffer tape to technician accessories.

Contact Portsmouth Rentals

Phone: + 644 380 9701

Email: rentals@portsmouth.co.nz

Weta Limited

Weta Limited is the merchandising arm of Weta Workshop. It produces and sells a range of exceptional, high end collectibles, apparel, books, chain mail and object art. Weta Limited also manages the Weta Cave retail store at 1 Weka St, Miramar, Wellington. The Weta Cave provides fans and tourists with a rare insight into the world of Weta.

Contact Weta

Phone: + 644 388 8646

Email: info@wetanz.co.nz

Website: www.wetanz.co.nz


Research

Modelling For A Game


A month or two ago i was browsing through twitch.tv ‘s development section and came across someone working on a game which is on steam called “Nomad”.

“Nomad is a blocky sandbox zombie survival game. Hunt, craft, kill and survive! Nomad is set in the future after a zombie apocalypse. Find food, drink, weapons, ammo and medical supplies – or craft them! Explore Set years after an apocalypse, the world is over grown, broken and abandoned.”

Nomad is made in Unity and as we are using Unity in class and learning it i thought id try get on board with the Nomad project. After a bit of researching the game i found the 2 developers of the game and contacted them , explaining that i am interested in modeling and study game design. I requested he gave me a task / live brief and if i was good enough i asked could i get on board with the project.

He gave me a task and stated this “Create a building and a weapon that are styled and would fit in with the world of Nomad” he did not set me deadline or set me any other rules/recommendations.

I bought the game on  steam and explored the world a bit taking screenshots of building’s exteriors / interiors and just general mapping so i had a feel for how the game was.

Here are some i took :

Now i had seen the game for myself and had a feel for the style of the game i got to work thinking of a buildings i could try , it came to mind when i seen the store/market in the game that a shop would be good i also seen the cars and decided why not make a gas/petrol station including a little store.

After making the pumps and the parking areas (i do not know official name) at home i worked on the actual building (store part) of the compound in class while working and when i got home i combined the two and was finished with a non textured compound.

Here is the screen caps straight from 3ds Max of the gas station without textures etc :

After finishing my model i contacted the developer again and asked for feedback , how i could improve or if it was wrong style / general criticism.

“that’s pretty much nomad models”
” just simple low poly stuff”
“it looks good man, good work”

*update 24/01/2015*

Since this post was wrote up i have talked to the dev and he has agreed to help me join in the production of this game. I will be writing a blog post on the modelling i do when it comes round to starting as the dev is deciding on a complete revamp of a map and is planning then will be giving me a list to work on. I am still in contact so i hope to be able to work for a longtime.

LEARNING TO MAKE AN RPG STYLED GAME IN GAME MAKER PART 2

LEARNING TO MAKE AN RPG STYLED GAME IN GAME MAKER PART 2

As stated at the end of my last blog post found here :

Learning to make an RPG styled game in game maker Part 1

I wrote “I now have a empty “room” with a sprite that moves left , right , up and down with walking animations.” , I am now going to work on developing this more , here is the video i am now following (part 2 in the playlist) if you would like to watch it :


Step 1 : Creating A Background / Creating A TileSet

Just like previously i am going to need some resources from online as i do not have our games resources to use , i found this nice set online which is also used in the game , this set of props is called a Tile Set , just like the character sheets we can select certain things from the sheet and it is easy to keep them all together.

Now i have the image , i create a background in game maker named “background_tileset_main” in the properties i have ticked the box that creates this into a tile set and left the option on the default 16 pixels by 16 pixels , this option allows me to select 16 pixels by 16 pixels of the tileset at a time.


Step 2 : Creating The Floor Of The Level

Now i have created my tile set i can take it into the “room” that i have which is currently plain and just holds my sprite and i can edit it. When holding shift i can paint the tile i have selected across the grid. First i add the 4 corners and then i add the inside. Here is a GIF of me “painting” the tiles on to the level:

floor


Step 3 : Add Detail To The Level

Now i have a plain for me to work on , like a background to the world , now lets add more detail to the level , i now added small things like grass. To do so i need to go on the room and create a new layer above the layer i just filled with dirt/basic grass.

I was also instructed when making a level to note down what is on each layer in a text document so here is mine so far :

1000000 – floor (Default Layer)
999990 – paths and grass

As it is not anything important of a game i am not paying to much attention to detail and making levels look good as my main aim is to get better at coding.


Adding My Own Touch

I decided to pause the video and before my next step see if i can add my own touch to the code.

1st personal addition 

Add a run feature , here is the code that made such a thing happen :

if (keyboard_check(vk_left )and keyboard_check(vk_shift)){
sprite_index = sprite_dwarf_left
x -= 4;
image_speed = 0.3;
}

So , as well as having the normal code that walks i added 4 of these sections of code corresponding to each direction left , right , up and down. This code basically means if left and shift is pressed together then increase the movement speed to 4 and also increase the walk animation to 0.3 meaning he walks faster and also moves his legs faster.

2nd personal addition

When the user did not press anything the character would run/ walk on the spot so i decided with the help of a friend id add this piece of code in :

if keyboard_check(vk_nokey){
image_speed = 0;
}
It is pretty simple , it just means when no key is pressed the character will stay on the sprite part of the animation it was on , in the future i will have an animation for when they are inactive / when the user is not pressing anything so the character does not freeze mid running however id prefer this to running on the spot.

3rd personal addition

i decided that the default tutorial code of when the game is started that the character was still running on the spot was strange also , so i changed that to

image_speed = 0;

so it was just a still character sprite


Graphics wise i also added a path through the middle of the room.


So then that’s video number 2 done and i feel i’m making allot of progress and i’m happy that i could add my own little touch to the code , i know its nothing amazing or in depth but being able to know what the little bits of code mean and be able to use them myself when not following a tutorial shows i am learning it. Here is a little GIF of my progress so far including  :

  1. walking
  2. running
  3. path and grass
  4. standing still has no animation

walkandrungif.gif


Learning to make an RPG styled game in game maker Part 1

Learning to make an RPG styled game in game maker Part 1

So then , seen as though my new project outside of class with a few others is making a RPG style game i thought it would be beneficial for me to learn how to make the style of game we will be developing. This would benefit me because i will understand how to make a game , get me better at coding and also means that i can understand what the coding part of the team is talking about when they discuss coding the game, finally i can also then help with small things regarding coding like smaller jobs / tasks to improve the game that are less important then giant features of the game that they will be handling.

As mentioned in the other post i did , i am on the design team but like i said , it will help me to learn this and its also needed for my course to write about my progress in coding and as i have not done much code related blogs its about time i did.


To start work on this bit of education in game maker i have looked online (YouTube) for a tutorial playlist on how to make such a game and found a nice playlist made by a guy called “rm2kdev” . It is a 21 part playlist and i intend to watch it all and document it all on this blog. If anyone is interested in checking the  playlist out here is the link to part 1 :


Step 1 : Importing And Creating Sprites

First of all i was told to look online for a character sheet or have one made by someone , to save time i just got one online as our game sprites are not made yet and are still being done. Bellow is the character sheet i used.

Now i have a character sheet ready i need to head on over to the sprites section in game maker and create a new sprite. I named my sprite like so “sprite_dwarf_down”. I used the name dwarf for no important reason other than its a character in our game so if i need to reuse this code for the dwarf it was ready. From here i opened the sprite menu for the created sprite and selected “edit sprite” then “file” “create from strip” this gives me the ability to load a full sheet like the character sheet and select a row or column of images and use them. I selected the first 3 images on the sheet of the blue hair character and confirmed my sprite, from here i duplicated the sprite and renamed each to “sprite_dwarf_left” “sprite_dwarf_right” “sprite_dwarf_up” and changed the sprites to the set of sprites corresponding to the direction of the blue hair sprite would face.

Step 2 : Sprites Animation

Now i had to create the object for the character , this will old the animation for the sprite and also code corresponding to it. I created an object and named it “object_dwarf” i added a “create” event and gave it a ” execute code” action  with the following code

image_speed = 0.1;

This line of code sets the speed of the animation within the sprite toggling between the 3 images on each row.

I now have a sprite that would stand still but toggling through the”sprite_dwarf_down” animation.

Step 3 : Adding A Room

Now i need somewhere to put this sprite , i navigated over to the tab named “rooms” and created a room named “room_learning”. In here i set the dimensions to 1280 by 720 and also enabled a few options that i was instructed to like making the camera follow the sprite and scaling properties.

Step 4 : Sprite Movement

So then now we need to make the sprite actually move around the room ,by room i mean the level not a building’s room. I head on back over to the object “object_dwarf” and added a new event named “Step” within the event i added another “execute code” action and added the code :

///handle input logic

if (keyboard_check(vk_left)){
sprite_index = sprite_dwarf_left
x -= 1;
}

if (keyboard_check(vk_right)){
sprite_index = sprite_dwarf_right
x += 1;
}

if (keyboard_check(vk_up)){
sprite_index = sprite_dwarf_up
y -=1
}

if (keyboard_check(vk_down)){
sprite_index = sprite_dwarf_down
y+=1
}

What does this code do ? when reading that code you can learn what it does without the fancy words,  line 1 implies it handles inputs ,these inputs being ,you pressing a key makes it input that you have pressed it and takes an action. then line 3 shows that it checks if you press the vk(virtual key) left then : it wants the sprite to change to sprite_dwarf_left line 5 also shows that within this section of the code i am wanting the sprite to move “x-=1” so it wants the x position to -1 from its current position meaning the character moves left.

I repeated that little bit of code and changed the directions of movement and sprite accordingly to the direction it was moving.


GIF.gif


I now have a empty “room” with a sprite that moves left , right , up and down with walking animations.

That is the end of video one and i feel like i have made progress in game maker as it is the first time i have used it in 3 or 4 years and have forgot everything about it i am now going to start the next part of the playlist and will be posting a blog post of the next part.


Leading A New Project – Planning And Progress

Introduction

To make my portfolio better and to try achieve something worth showing I started to think of ideas that would make me stand out over other people. I have set myself a target of releasing a game on steam. I got together with another member of my class and we started to brainstorm ideas of what kind of game we would like to do , I made a drive and set up some organised files.


Planning

When planning an idea , we tried to answer these questions :

2D or 3D?

Type Of Game ?

Objective Of The Game ?

Program We Going To Use To Make It ?

Need Animation ?

Art Style ?

Any Information On Type Of Characters ?


Here is the answers we ended up deciding on :

2D or 3D? 2D

Type Of Game ? Dungeon completion , Free roam exploring , gear upgrading , base building , class based game with levelling up and possible familiars

Objective Of The Game ? Adventure , get bet gear and take on quests

Program We Going To Use To Make It ? Game maker

Need Animation ? Simple 2D sprite movement for things like walking , jumping and attacking

Art Style ? Pixel art

Any Information On Type Of Characters ? Typical Dwarf warrior , Elf archer , Mage Human . All can be male and female.


Getting Organised

Now that we had a base for the game I started to create more documents in our drive to help keep organised one being a document of general notes , it currently has a list of overall :

Needs Doing , Done and Future plans / Game Feature Ideas , Here is the list :

Needs Doing :

  1. Publishing Research/Distribution
  2. Concept Art For All Aspects Of The Game
  3. Character Design
  4. Weapon
  5. Friendly AI
  6. Enemy AI
  7. Terrain Designs
  8. Studio Name
  9. Game Name
  10. Dungeon Assets Designs
  11. Storyline

Done :

  1. Core Design / Base Idea For The Game Questions/Plan
  2. List Of Core Job Roles
  3. Recruit Roles / Set Basic Team Up

Future Plans / Game Feature Ideas :

  1. Contact Publishers


Expanding The Team

As you can see in the previous part in the done section I said “Recruit Roles / Set basic team up. Me and the other project leader decided we should most likely get other people to help us so we can split the jobs up to get more work done and so we could have more ideas.

We expanded the team to , two coders (one  being the other project lead) and 3 people on design (one being me).

I then proceeded to make a document with a giant list of roles for both coders and designers some for example is :

designers :

  • Base designing
  • HUD
  • Menu’s
  • Enemy AI

Code

  • Missions
  • Movement
  • Ai
  • Combat system


Concept Art

I will be posting pictures of the character concept art on another blog post when I go through the characters (the full progression from concept to full colour characters for the game).

With the other members of the design team we made a spread sheet  of concepts so we have concepts for many things , one of the things I assigned myself to was the starting building (The Tavern).

As I can not draw at all I did it all on Photoshop , I started with simple wall assets and windows etc. , here is some screenshots of them :

Concept assets


As you can see these were the original concepts for wall asset and ones with windows (they are no longer used)

I then decided to come up with a mock up small room :

Concept assets 2

(which also is no longer used)

From here I made the room wider revamped the walls and floor and added a bear rug and stair case to see how the room could look. Bellow is a GIF of the process , some browsers are not supported for gifs like internet explorer.


GIF.gif

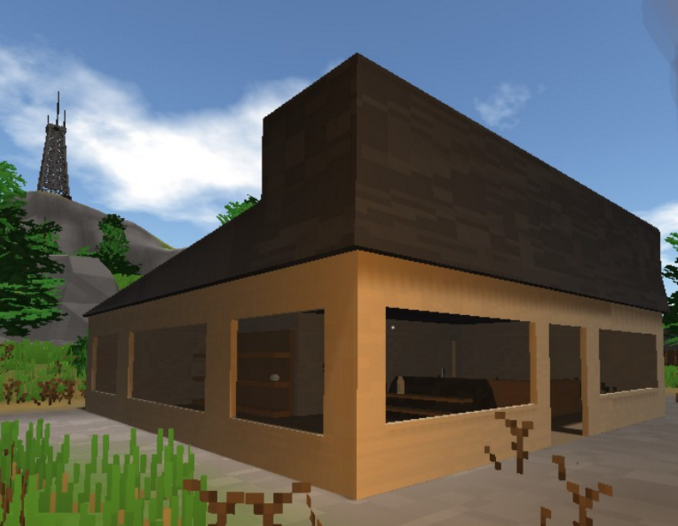
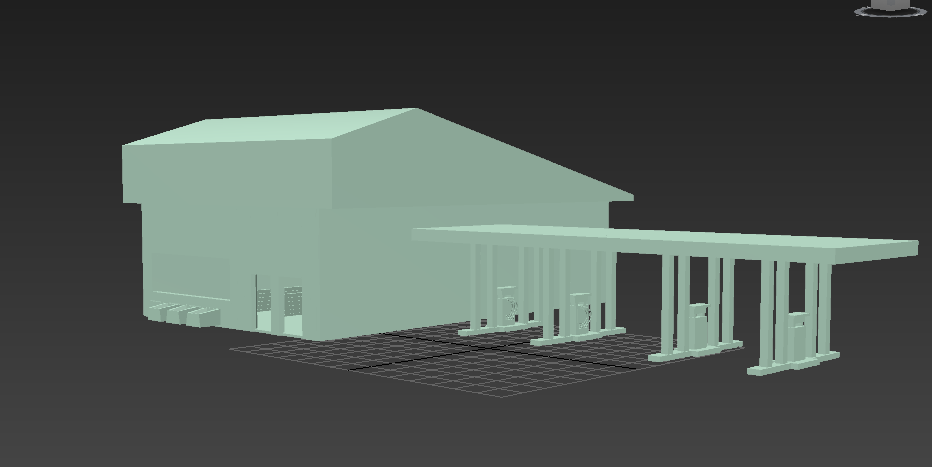
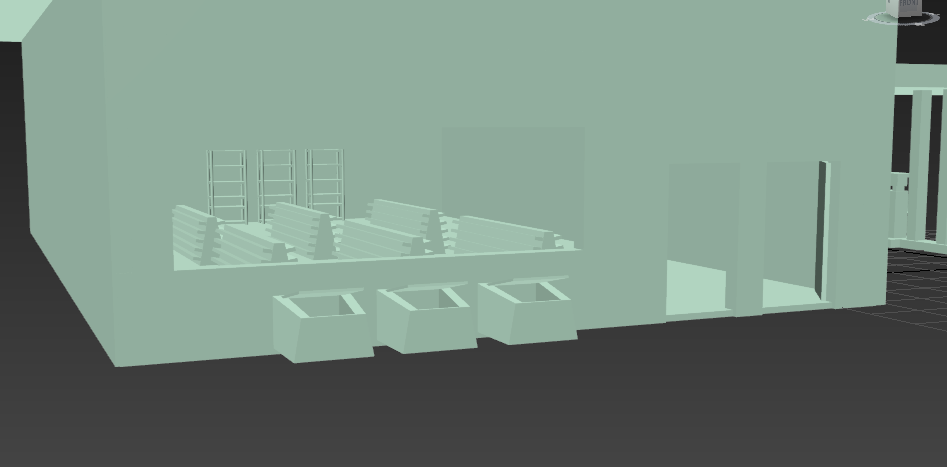
Here is my current screenshot of the tavern :

Full Cavern Concept v2 screenshot

I have left lots of black space / void on the left side of the tavern because there is going to be one or two rooms , the tavern also needs allot more decorating.

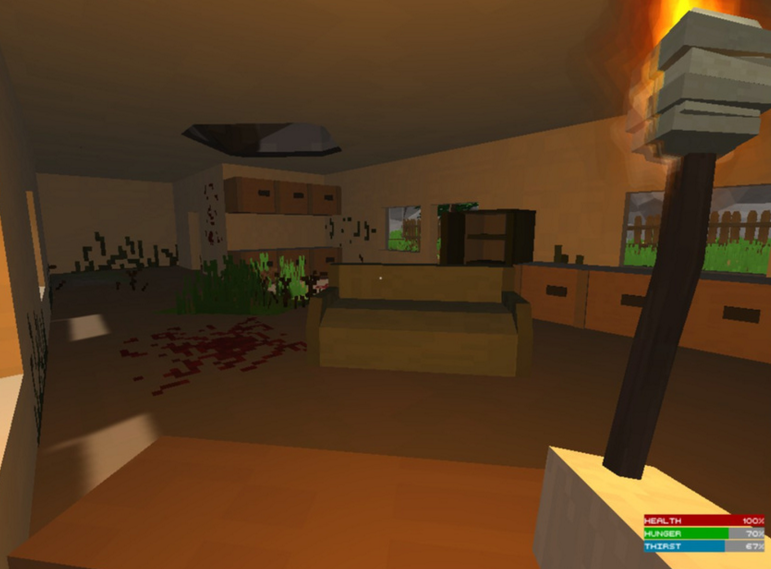
Here is a screenshot of how close the camera might be when walking around the room :

Untitled-1


VFX Shoot Concept Idea

Today in class we were moved into new seats in the room creating new groups to work with , within these groups we were tasked with creating a pitch/concept for a VFX shoot . The requirement of making this shoot was , there was no interaction between objects and also no camera movement , it had to be a still shot recording.

In our group we sat down and discussed different VFX concepts , we came up with these ideas

1)Drone flying

2)Spaceship flying overhead

3)R2D2

4)Rocket being fired down a corridor

5)Robotic spider

The end idea we came up with was shooting a rocket launcher down a corridor but as if you are in a game , the main character will be looking down the character but the camera will be his eye sight so there will be a HUD so like a map maybe , ammo count and other HUD related features. The character will see a floating rocket launcher in the centre of the corridor rotating , the character will walk forward into it and then it will switch to him with the launcher in his hand , he fires it and the rocket speeds off down the corridor , the camera will switch to next to the rocket and as it passes the camera it slows down and zooms into the rocket as it fly’s down the corridor .

I will be writing a blog post next week showing of drawings of things such as mood boards , concept drawings of the rocket and rocket launcher.

Lesson In VFX – The Introduction

Today we were introduced to VFX. This blog is going to be a summary of todays lesson.

First of all, the lecturer showed us the mark scheme for this subject, showing us what we needed to do to gain a good mark / grade.

First of all is our Blog , we need to represent the topic in our blog and explain our understanding and display our work appropriately to display progress in developing skills. The blogs should cover what we are doing good at , how good our team work is in all of our group work activities what we could do to improve in everything we do and also what went bad in the lessons or in our work that can be fixed in the next lesson.

We should also show planning of our work throughout the topic of all of our work, both independent and group work.

We need to show evidence of a shoot taking place this can be done through time lapses , photos etc.

Next up we were given the definitions of both visual effects and special effects , here they are :

Visual Effects :

“In filmmaking, visual effects (abbreviated VFX) are the processes by which imagery is created and/or manipulated outside the context of a live action shot. Visual effects involve the integration of live-action footage and generated imagery to create environments which look realistic, but would be dangerous, expensive, impractical, or simply impossible to capture on film. “

Special Effects :

Extraordinary visual effects in a motion picture or television program achieved by technical means, either optically, digitally, or mechanically.

We then proceeded to discuss the Bafta and Oscars awards for VFX , we got into groups and guessed which had nominations , the answers were :

BAFTA nominees :

Star Wars

Mad Max

Ant Man

Ex_machine

The Martian

Oscar nominees :

Ant Man

Avengers

Ex_machine

Jurassic world

Mad Max

The Martian

The Revenant

Star wars

Tomorrow Land

The walk

Finally we moved onto our lectures “VFX Timeline” :

1976 – Steady cam

1977 – star wars

1978 – Superman -Z Optic system – flying man

1982 – Star trek 2 – full CGI scene

1989 – the abyss – creation of full soft bodied character

1991 – Terminator – Photoshop

1993 -Jurassic park  – full CGI animal

Marriot Hotel App Progress

Today we have started to get back to work on the Marriot Hotel App , we had a meeting and discussed the roles between the group.

As the base plan of the app and base graphics for the layout was completed everyone was put forward to code now , between the 7 of us we split the remaining code between us.

We uploaded our current progress to the drive so everyone had access to a shell of the app featuring the two basic menu buttons and the size layout.

I took notes of the tasks and the people assigned to each job. Here is the layout of the notes :

Sub menu – Nathan and Cate

Swipe navigation between the pictures – Tom and Josh

Course choice button – Beth

Checkout screen – (Not assigned because needs other tasks done and this is a final job to do , to complete the app)

Stopping the two menus from overlapping and being able to be clicked at same time – Jess and Gabriel

Database – (Again this has not been assigned cause the way it will work has not yet been decided or worked out)

This was a brief blog to report progress on the app , I will write another one to show evidence of the work and what has been done.


2D Asteroids Game In Unity

I will be starting a 2D project in unity today , this is the traditional asteroids game with my own little customisations to give it that extra kick to make it stand out.


Our lecturer had some videos for us to follow to make the game so I begun to follow the instructions / tutorials.

In the first part ( being an introduction to 2D unity ) I was told to visit a site and download some free assets for the game to use as a template. The site is :

http://kenney.nl/

I navigated to the asset pack page and downloaded this pack here :

http://kenney.nl/assets/space-shooter-redux


Here is the assets that I downloaded as an image

sheet

At the end of the first video I now have a background tiled , my camera sized and positioned and assets ready for disposal. I will be moving on to part 2 now and will write another blog of the progress.